")
How to Client or Freelancers Verify Identity on Freelancing Post (Complete Guide): In today’s blog post, we’ll look at How to Client or Freelancers Verify Identity on Freelancing Post.
Why Identity Verification is Important:
Before going into the process, it is important to understand why identity verification matters.
When you verify your identity, it shows that your profile is genuine. This builds trust among users and increases your chances of getting work or hiring the right person. Clients feel more confident hiring verified freelancers, and freelancers feel safer working with verified clients.
Verification also helps reduce fake accounts, scams, and fraudulent activities on the platform. It creates a professional environment where users can focus on work without unnecessary risks.
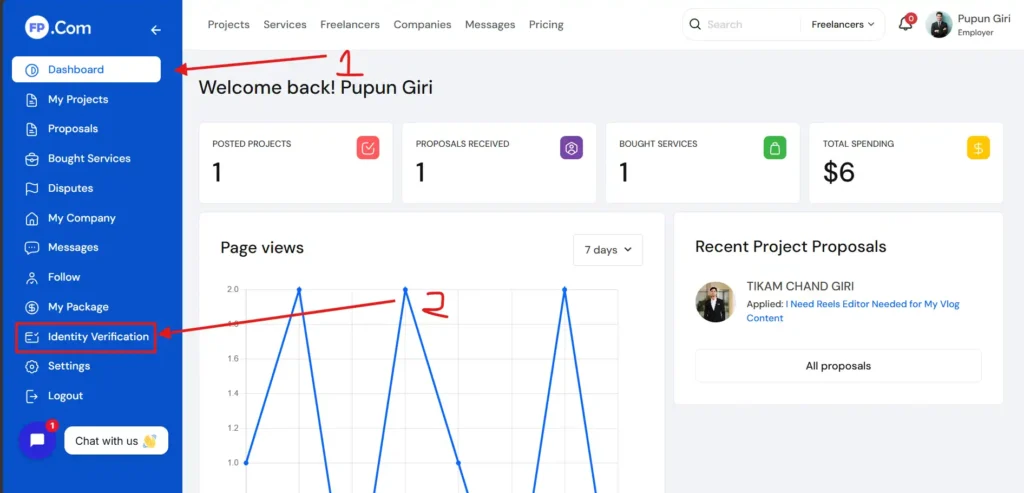
Step 1: Login to Your Account
The first step is to log in to your Freelancing Post account. Once you are logged in, go to your dashboard.
Look for options like “ Identity Verification.” These sections usually contain the identity verification feature.
Step 2: Navigate to Verification Section
Inside your account settings, you will find a section dedicated to verification. It may be labeled as:
This is one of the most important steps. You will need to upload a valid government-issued ID.
Common documents include:
- Aadhaar Card
- PAN Card
- Passport
- Driving License
Make sure:
- The image is clear and not blurry
- All details are visible
- The document is valid and not expired
Avoid uploading edited or cropped images, as this can delay or reject your verification.
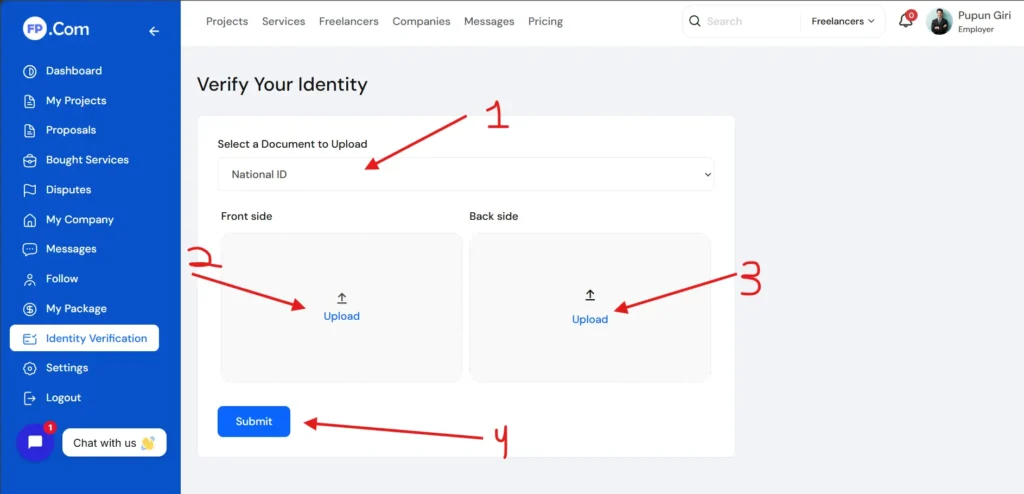
Step 3: Submit for Review
After uploading all required documents, submit your verification request.
The platform will review your details and documents. This process may take some time, depending on the system.
During this time, make sure you check your email or notifications for any updates or additional requirements.
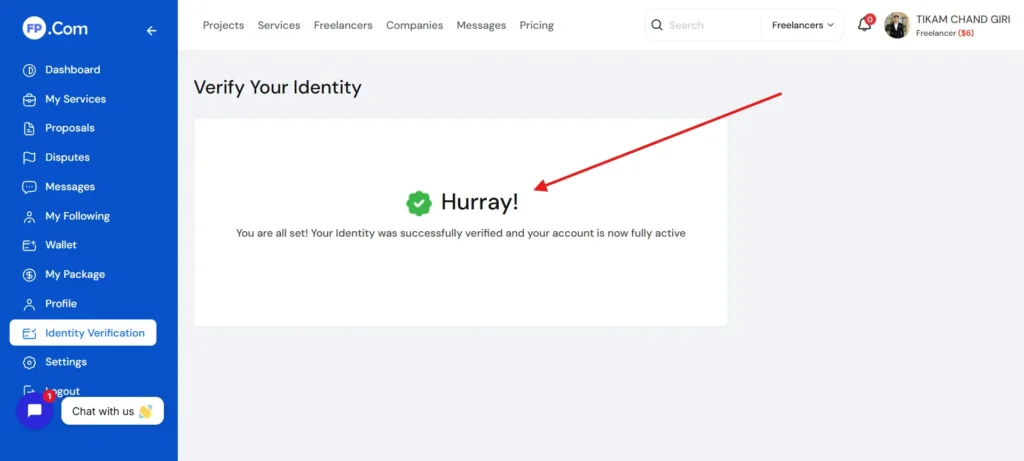
Step 4: Verification Approval
Once your documents are verified successfully, your account will be marked as verified.
You may receive:
- A verification badge on your profile
- Confirmation notification or email
This badge helps you stand out and builds trust with other users.
Common Reasons for Verification Rejection
Sometimes, verification may fail. Here are common reasons:
- Blurry or unclear document images
- Mismatch between profile name and ID
- Expired or invalid documents
- Poor quality selfie
If your verification is rejected, do not worry. Simply correct the issue and submit again.
Tips for Successful Verification
To make sure your verification is approved quickly, follow these tips:
Always use clear and high-quality images. Make sure all text on your document is readable.
Ensure that your profile name matches your ID exactly. Even small differences can cause rejection.
Use proper lighting when taking photos. Avoid shadows or dark backgrounds.
Follow all instructions carefully. Do not skip any steps.
Be patient during the review process.
Final Thoughts
Identity verification on Freelancing Post is not just a formality. It is an important step that helps create a safe, professional, and trustworthy environment for everyone.
Whether you are a freelancer looking for work or a client searching for talent, verifying your identity adds credibility to your profile and improves your chances of success.
Take the process seriously, follow the steps carefully, and ensure that your information is accurate. A verified account not only protects you but also helps you build long-term trust on the platform.
For a complete step-by-step visual guide, don’t forget to watch this video: