

Hello Freelancers & Employers, In today’s post we will teach you how to open your new account on FreelancingPost.Com for free. You can open it on Computer, Tablet & Mobile in the same steps, as I have mentioned in this post.
Step No 1
First, you will reach the home page of our website by searching FreelancingPost.Com, and at the top you will see the Sign in section, click on it, for more information, see the image below, we have marked it with an arrow.

Step No 2
After clicking on the Sign in section, the Sign In page will open in front of you, but we will not fill anything in the Sign In page, because we have to open a new account, so for that now we have to click on the Sign Up section, as I have given in the image below.
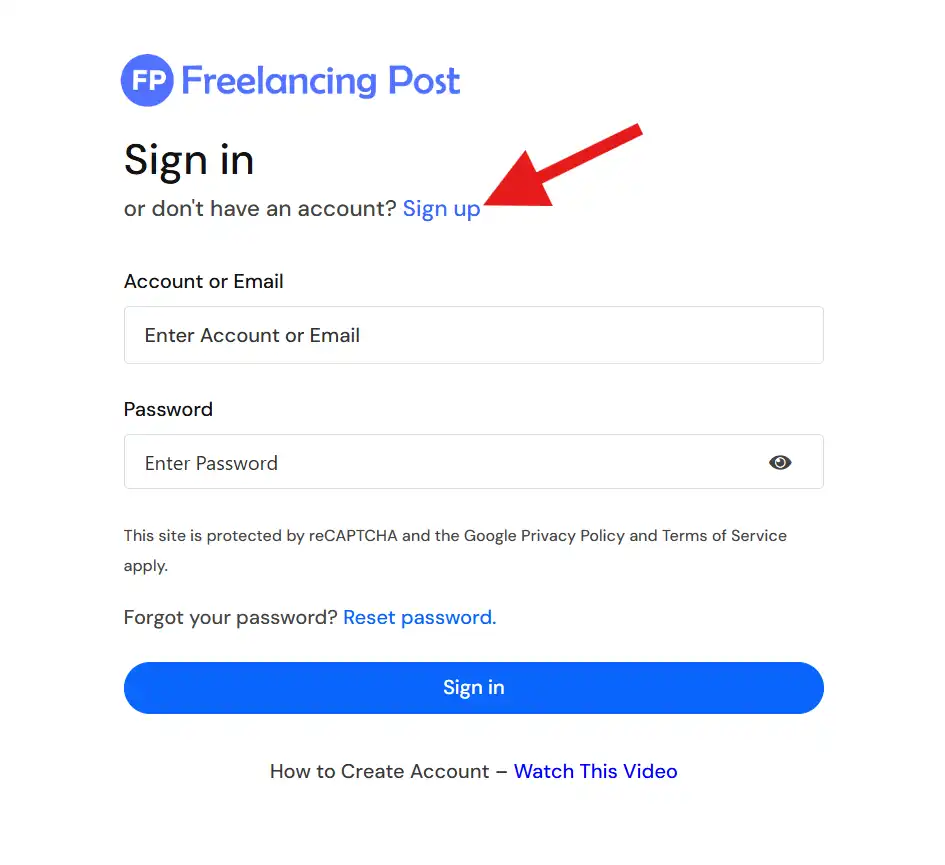
if you still don’t understand anything from the image, then you can click on the signup text above and reach the direct signup page. I have given the URL of the direct signup page in the signup text.
Step No 3
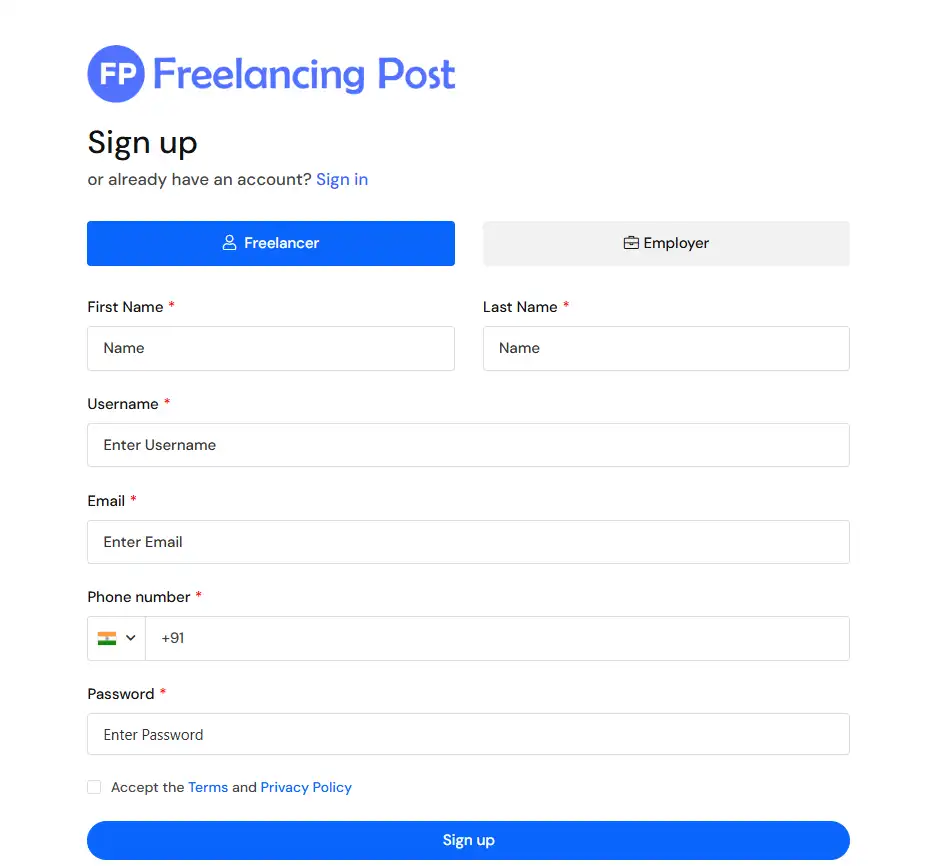
After Clicking Open the Sign-Up Page
Visit FreelancingPost.com and click on the Sign Up option. You will see a clean and simple registration page with two options:
- Freelancer
- Employer
Choose the option that best describes your role.
Choose Your Account Type
If You Are a Freelancer : Select the Freelancer button if you want to:
- Offer services
- Apply for projects
- Build your professional profile
- Earn money online
If You Are an Employer : Select the Employer button if you want to:
- Post projects
- Hire freelancers
- Manage work and payments
- Grow your business with skilled professionals
Note: The form remains mostly the same for both, but your dashboard features will differ after signup. You can also change your role later.
Enter Your First Name and Last Name
You will see two required fields: Enter your real name to maintain trust and professionalism on the platform. This helps clients and freelancers identify you easily.
- First Name
- Last Name
Choose a Username
In the Username field:
- Create a unique username
- Avoid spaces
- Use letters and numbers if possible
Your username will be visible on your public profile, so choose something professional and easy to remember. Example:
- johneditor
- designwithrahul
- hirewithanita
Enter Your Email Address
In the Email field:
- Enter a valid and active email address
- Make sure you have access to it
Your email will be used for:
- Account verification
- Project notifications
- Important platform updates
Add Your Phone Number
Select your country code (for India, it is +91) and then enter your phone number. Make sure the number is correct and active. Your phone number helps with:
- Account security
- Verification (if required)
- Important communication
Create a Strong Password
In the Password field:
- Use at least 8 characters
- Combine uppercase, lowercase, numbers, and symbols
A strong password keeps your account safe from unauthorized access.
Example:
- Freelance@123
- Secure#Work2026
Accept Terms and Privacy Policy
Before completing the signup, you must:
- Check the box to accept the Terms and Privacy Policy
This confirms that you agree to follow platform rules and understand how your data is used.
Tip: Always read the terms to understand your rights and responsibilities.
Click on “Sign Up”
Once all details are filled correctly:
- Click the Sign Up button at the bottom
Your account will be created instantly.
Step No 4 is Last Step
After completing the signup form on FreelancingPost.com, the next and most important step is Email Verification. This step ensures account security and confirms that the email address belongs to you.
Let’s understand how to complete this process correctly.
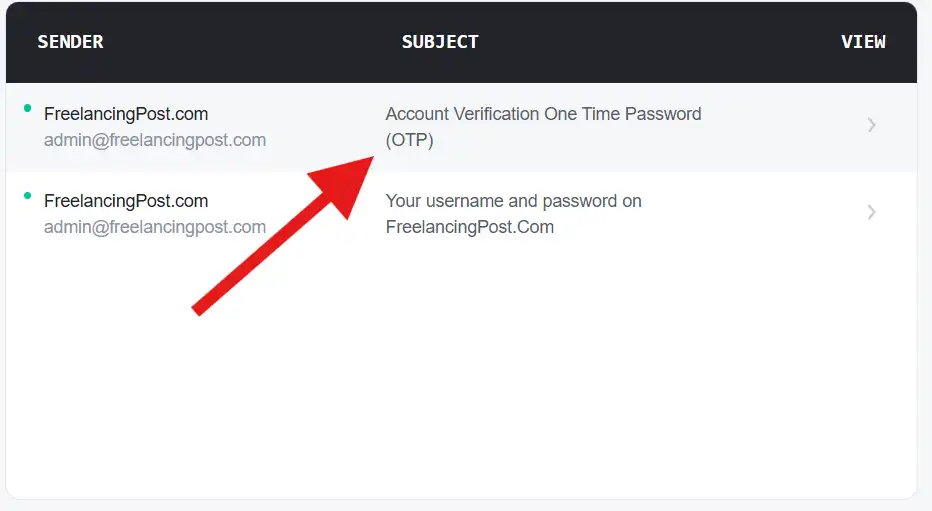
Than Check Your Email Inbox
Once you click on Sign Up, you will be redirected to the Verify Email page. At the same time:
- A verification code is automatically sent to your registered email address
- This email usually arrives within a few seconds
Tip: If you don’t see the email, check your Spam or Promotions folder.
Enter the Verification Code
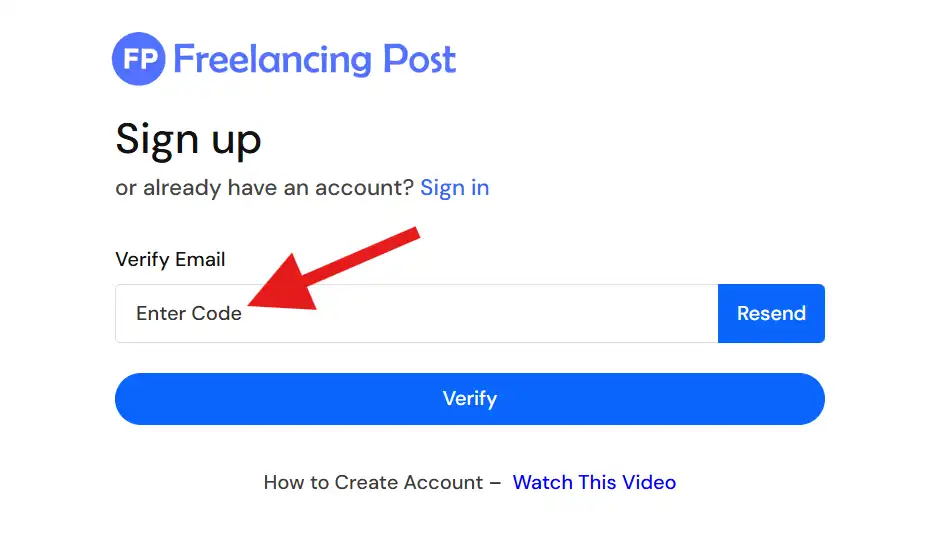
On the verification screen, you will see:
- A text box labeled “Enter Code”
Carefully:
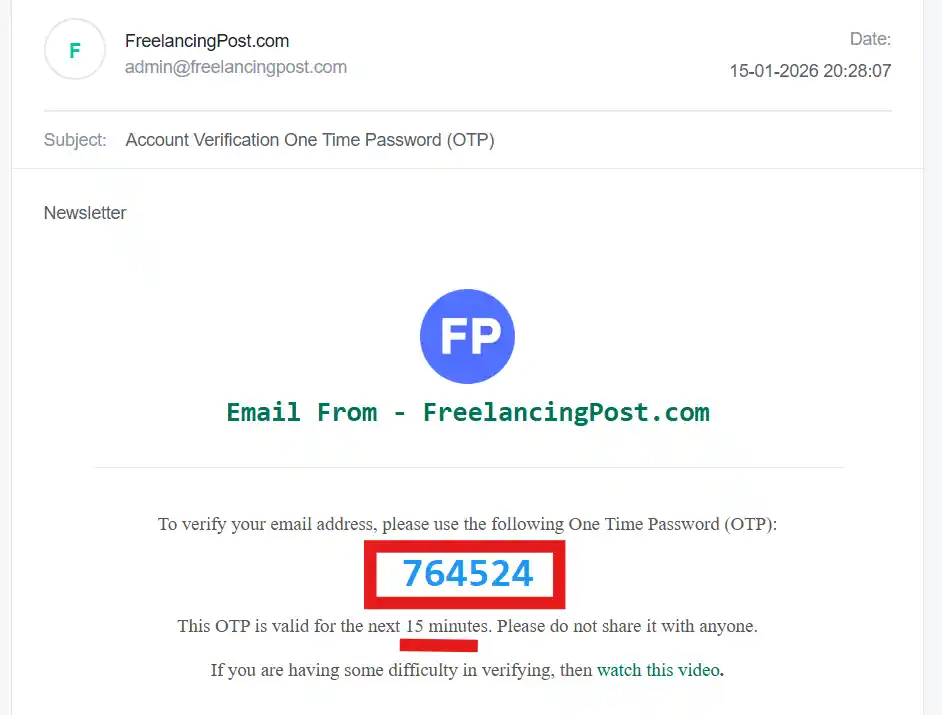
- Open the email from FreelancingPost
- Copy the verification code
- Paste or type it into the Enter Code field
Make sure:
- There are no extra spaces
- The code is entered exactly as received
Click on the “Verify” Button
After entering the correct code:
- Click the Verify button
If the code is valid:
- Your email will be successfully verified
- Your account will be activated instantly
- You will be redirected to your dashboard or login page
Use the “Resend” Option (If Needed)
If you did not receive the code:
- Click on the Resend button available next to the input box
This will:
- Send a new verification code to your email
- Replace the old code
Note: Always use the latest code sent to your email.
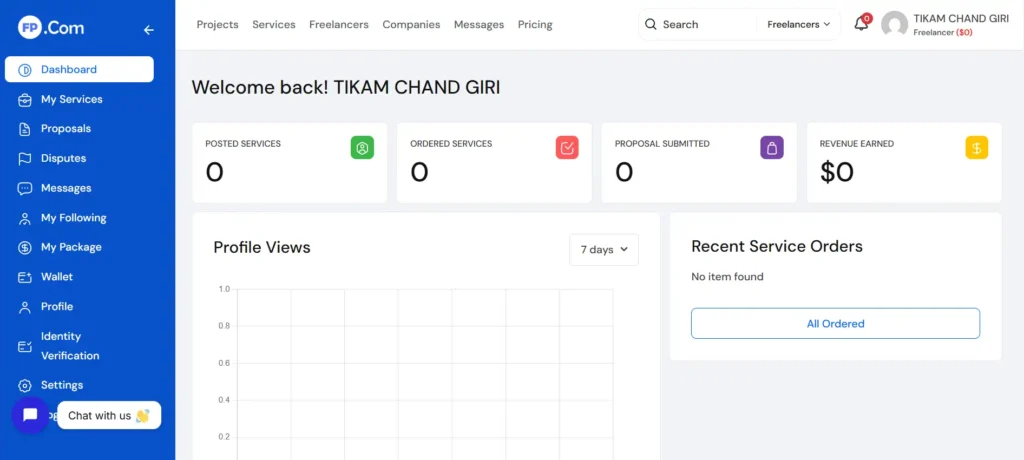
After clicking on the Verify button, your account will be successfully opened and you will reach your dashboard.
So this was our FreelancingPost.com Website, How to SignUp, Step By Step Details. If you have not read this post and understood it, then watch the video given below, we have explained it in details. Thank you
Most Read Full Post